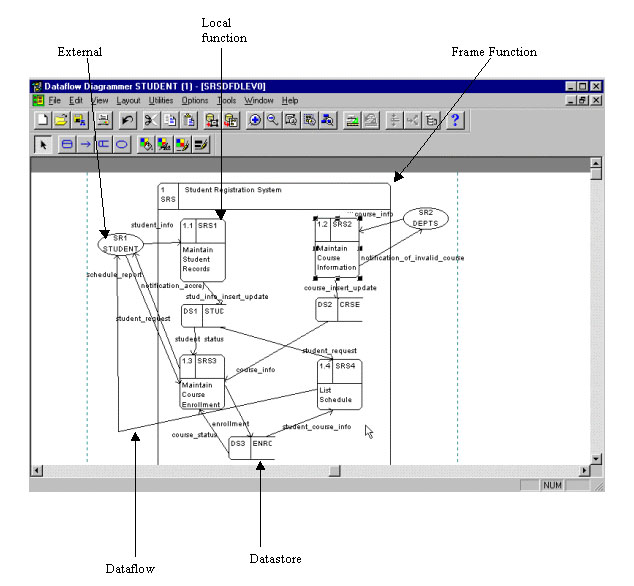
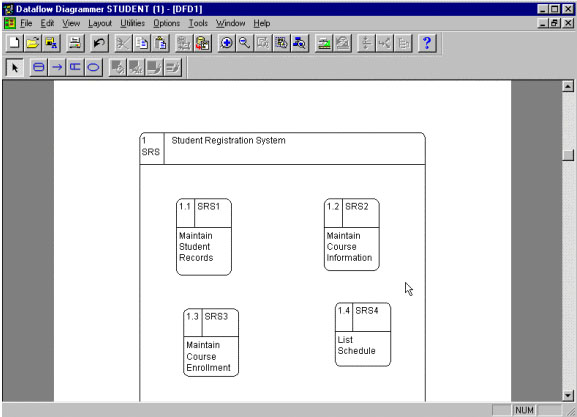
Figure 2.1: Graphical Representation of a Dataflow Diagram
 Tutorial for Oracle9i Designer
In this lesson, you will learn to create a data flow diagram using the Dataflow Diagrammer. Specifically, this will involve the creation of :
What is a Data Flow Diagram?A Data Flow Diagram (DFD) is a process-oriented graphical representation of an application system. In the words of Hoffer, George and Valacich (1999), a DFD "is a picture of the movement of data between external entities and the processes and data stores within a system."
Some terms used when working with the Dataflow Diagrammer
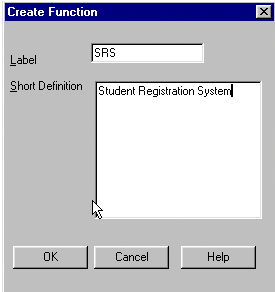
A function, in the context of Designer Dataflow Diagrammer, is similar to what is referred to as "process" in the discussion on DFD in your text-book. A "process" is defined as: "The work or actions performed on data so that they are transformed, stored or distributed" (Hoffer, et. al., 1998). Presented below are some types of functions that we will use in our dataflow diagram.
Frame Function is the main function that will contain all the child functions under it.Local Function is a function within the Frame Function while the Global Function is one that is outside.
A Datastore is a coherent collection of data. In other words, it represents data that is physically stored in locations like folders, notebook, a computer file or a database.
Dataflows represents the flow of data from a store to a function or vice versa
Externals like in the Process Model are organizational units or entities from other applications that can be used in the current application. External entities (externals) may be sources (from which data flows originate) or sinks (in which data flows terminate).
A Brief Narrative for the Dataflow Diagram
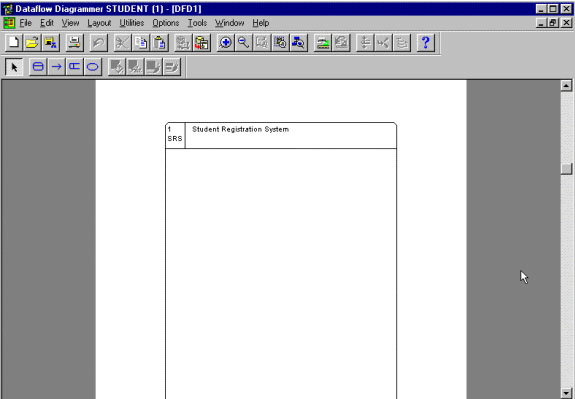
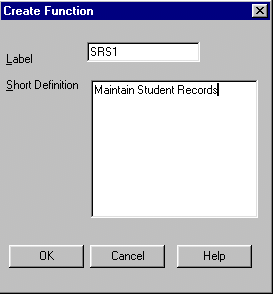
In this lesson, we will attempt to represent the processes that are embedded within the Student Registration System using the DFD technique. Let us assume that we have identified four main processes: maintain student records, maintain course information, maintain course enrollment, and list schedule. The process "maintain student records" accepts student information from students (say, during admission) and inserts the student information in the STUD datastore. In addition, this process also handles changes in student information (including changes in address, majors, etc.). The process "maintain course information" is responsible for receiving information about courses to be offered by the university from respective departments, validate the proposed courses, and insert/update CRSE datastore accordingly. If a proposed course is found to be invalid, a notification is sent to the concerned department. The "maintain course enrollment" process handles student requests for enrollment in a particular course. The process, first, checks the student status (e.g., whether full-time or part-time) from the 'STUD' datastore. Next, the validity of the course (e.g., whether the course is being offered) is checked from the 'CRSE' database and the enrollment status (e.g., whether the course is full) is checked from the 'ENROL' database. Once all these have been verified, the student is enrolled by recording this information in the ENROL datastore. If a student is not accepted into the requested course (due to whatever reason), a notification is sent to the concerned student. Finally, the "list schedule" process draws on information stored in STUD, CRSE and ENROL to generate the schedule that is sent to students. See Figure 2.1 for a graphical representation of the DFD that we will generate in the course of this lesson.
To create a Dataflow Diagram:
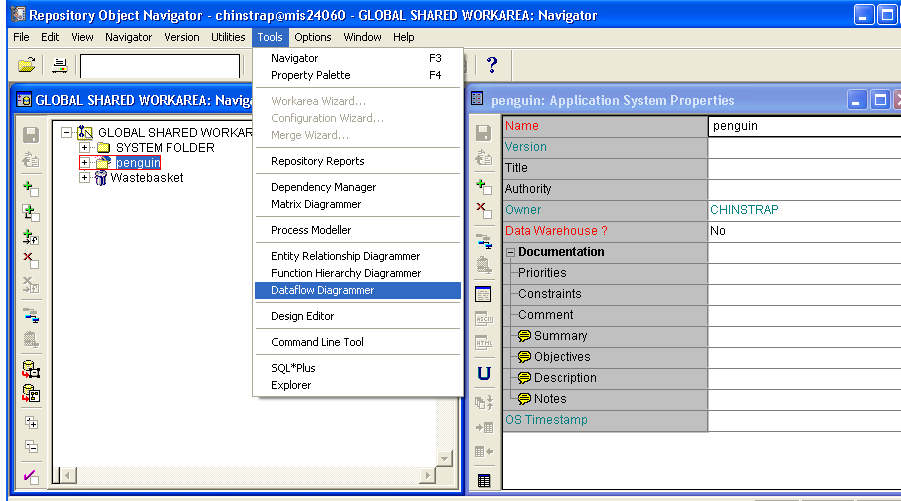
Figure 2.2a: Selecting the Dataflow Diagrammer from the Repository
Object Navigator
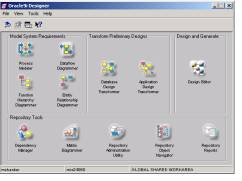
Figure 2.2b: The Designer/2000 Launch Pad

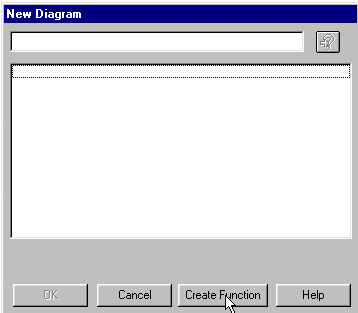
Figure 2.2c: Choosing Container
On to page two
Page 1, Page 2, Page 3 / Back to the tutorial index.
 About the Book Student Resources Oracle Resources
  Instructor Resources Contact Us