
![]()
![]()
![]()
![]()
![]()
Follow these steps to use the camcorder to make a video recording.
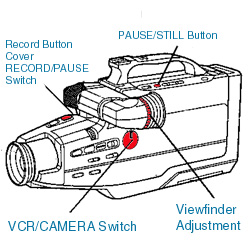
- Set the VCR/CAMERA switch to CAMERA

The Electronic View Finder (EVF) will indicate the camcorder is in the PAUSE mode
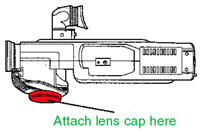
The lens cap can be attached to the hand strap with the built-in clip.
With your eye against the viewfinder Eye Cup, adjust the Vision Adjustment Control to your eyesight.

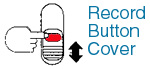
Slide the Record Button Cover up or down to protect (or access) the Record Button.
Press RECORD/PAUSE to start recording. The camcorder tally light is lit during recording.
Press RECORD/PAUSE again to pause the recording. You can start and stop the recording by pressing PAUSE/STILL
To remove the cassette. In record/pause mode, press STOP/EJECT.
To conserve power: After five minutes the RECORD/PAUSE mode will automatically change to STANDBY mode. To resume recording, turn the Camcorder POWER switch on.
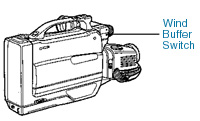
Wind Buffer Switch: This feature allows you to reduce wind noise. Usually, this setting should be set to NORMAL. Set to WIND BUFFER to reduce wind noise.
![]()
![]()
![]()
Home Page | Assignments | Syllabus | Instructor | JMC Web Site